
Monitor A High-Voltage Device
Sometimes it's useful to monitor a device that you don't directly control. It could be the burner in an oil boiler, an attic ventilation fan, living room lights - almost anything. In this example we'll monitor a simple sump pump that's controlled by a float switch. We'd like to know whether it's running, how often it runs, and how long it runs. We'd also like to trigger an alarm if it runs too long since that means that there might be a problem.
There are several possible ways to do this. In this case we'll use the RI-110A (formerly RI-1209) Relay Input Module. This unit has four relays in it, each with a 110VAC coil. One set of contacts on each relay is connected to the Vesta, allowing the Vesta to detect if the relay has been activated.
We'll connect the coil of one relay in parallel with the sump pump motor so that the relay is energized when the pump is running. Here's a schematic view - we've added the two wires shown as dotted lines.
When the sump pump motor is turned on, power is applied to the relay coil. That closes the relay contacts. Since one contact set is connected to a Vesta discrete input, the Vesta can detect that the relay has been energized. The other contact set is available for any other desired purpose - perhaps a low-voltage indicator light if desired.
NOTE: This is only a concept drawing. All wiring must be performed in accordance with applicable codes. Final design is the responsibility of the system designer or installer.
Wiring
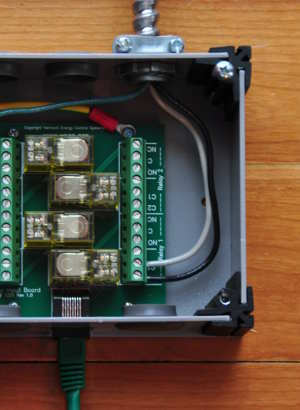
Wiring in this case is very simple - there are just two connections as shown in the schematic above. We're using relay 1, which is at the bottom right corner. The relay coil is AC, so there's no polarity - either wire can go to either coil connection. The green Cat5 cable at the bottom goes to a Vesta discrete input connector - we'll use the one labeled '5-8'.
At this point, physical setup is complete. The next section covers setting up the discrete input and rules on the Vesta.